How to Install the Authenticator Extension
To install the Authenticator extension, follow these steps: Open Google Chrome on your computer and go to the Chrome Web Store.
If using another browser, through the Authentication Extension website, you can find all the browsers where the extension can be used and the link for downloading it. Click the “Add to Chrome” button.

Let’s continue with the installation in the Chrome Web Store:
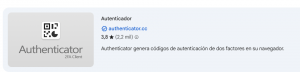
Search for “Authenticator” in the search bar.
![]()
Click on the corresponding extension.
Then click the “Add to Chrome” button.

A pop-up window will appear at the top of the browser; click the “Add to Chrome” button again.

Once the extension is installed, we will start configuring the extension.
Go to the top right corner of the browser and click on the puzzle piece icon to open the list of extensions in our browser.
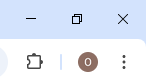
First, pin the extension by clicking on the pin icon.En primer lugar, fijaremos la extensión, haciendo clic en el icono de alfiler.
After pinning the icon, the Authenticator extension icon should appear to the left of the extensions icon.

To complete the configuration, click on the Authenticator extension icon. The extension will open, and each time the identified access requires the multi-factor authentication (MFA) verification code, the verification code will be generated.
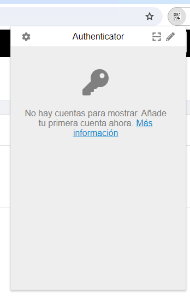
For convenience, go to the gear icon in the top left corner and go to the preferences section.
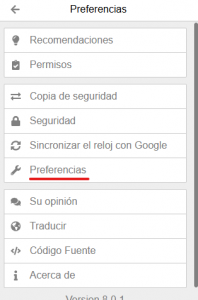
Finally, enable the “auto-fill” option so that each time a verification code is required, simply clicking on the code will copy and paste it directly into the verification code field.
