How to install the drivers and the PaperCut client for use on a centralized printer
If our computer does not have the drivers and the PaperCut client previously installed, before installing the centralized printer, we must install the necessary drivers and software for its use.
A script has been prepared that makes the changes as automatic as possible, now we will describe the steps of its installation on a system with Windows 10 and 11:
1. Locate the “Magnifying Glass” icon on your system’s taskbar. A screenshot of this application in Windows 10 and 11 is attached:
![]()
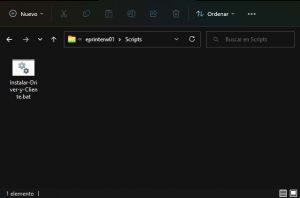
2. In the search field, type “\eprinterw01.umhnet.es\Scripts” and press the “Enter” key to open the list of available printers:
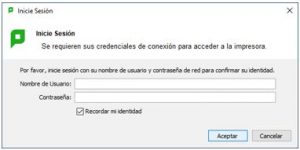
3. It will ask for the credentials of our domain user to access the repository. We must enter our email and our password:

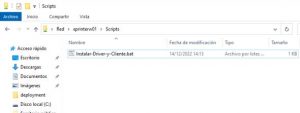
4. Once inside the path, we must run the script “Instalar Driver y Cliente.bat” (with double click)
5. Authorize changes on the computer (for the installation of the PaperCut client), it is possible that it will ask us again for the UMH user and password, we must enter the same ones as before:

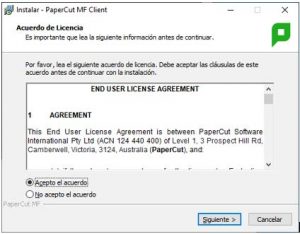
6. Accept the PaperCut client license:
7. Perform the installation of the PaperCut client with the default options.
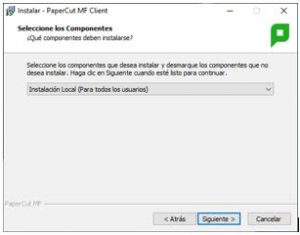
8. Select Local Installation (For all users):
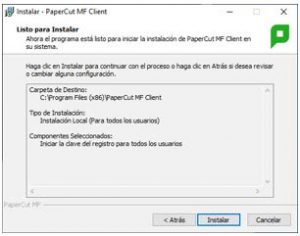
9. Confirm the installation:
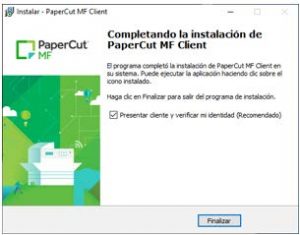
10. At the end of the installation, leave the option Present client and verify my identity (Recommended) checked:
11. Once the installation is complete, it will ask for the credentials of our domain user to whom the prints made will be assigned (if you accept to save these credentials, it is no longer necessary to enter them again)
Username: xxxxxxxx (do not enter @umh.es, just user)
Password: the UMH one