How to install a printer from the centralized printing service on a Windows system
If you want to install a printer from the centralized printing service of the Universidad Miguel Hernández on a Windows 10 or 11 device, follow these steps.
- Locate the “Magnifying Glass” icon on your system’s taskbar. A screenshot of this application in Windows 10 and 11 is attached:

- In the search field, type “\\eprinterw01.umhnet.es” and press the “Enter” key to open the list of available printers.
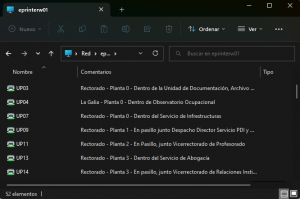
- Now simply double-click on the desired printer to start the installation process.
To add the printer in your room, you need to know the code assigned to it. You can see it on a sticker attached to the machine on the front below its screen.
| Warning:
If the device you are using does not have the Papercut software, it will be necessary to install the printer driver and its management software. You can see the necessary steps in the article: How to install the drivers and the PaperCut client for use on a centralized printer |