How to use the stapling function on the printers from the centralized printing service
28 March 2025
The intention of this entry is to give a quick idea of the uses of the new Konica Minolta equipment installed at Universidad Miguel Hernández.
Specifically, we will now focus on how to use the stapling function that appears in the initial menu of a printer from the centralized printing service.
To use the stapling functions available on the Konica Minolta copiers from the print drivers, we need to do the following. As we work in different environments (Windows, macOS, Linux), each has its own way of working:
Windows
From Windows environments, when we send a document to print and want to apply stapling functions, either in the corner or two staples in the middle, we need to do the following:
- Go to the Print Preferences screen. To do this, locate the “Magnifying Glass” icon on your system’s taskbar:

- Click on this “Magnifying Glass” application and type “Printers & Scanners“. Then select this option and click “Open“.

- In the list of printers that appears, find the one you have installed and click on it:

- Now select “Print Preferences“:


- From this screen, go to the “Finish” tab where you will see the following options:

- In this screen, the stapling mode is disabled.
Check the box and it will select the corner staple.
- The image shows how the staple would look in the stapled set, giving us an idea of the final result.
Once selected, click OK if you want to close the print driver dialog box, or Apply if you want to continue making more adjustments in the print driver.
If you want two side staples, from the Finish screen, expand to see the options:
- Choose the option (Position 2 (Left)):

And as we see in the image, the two staples will be positioned as shown in the drawing.
macOS
- First, make sure the driver has the option installed, which is the FS-533 accessory. To do this, go to “System Preferences“, to the “Printers & Scanners” section within the macOS system.


- Select the printer you want to configure, mark it, and click “Options & Supplies“. The following screen will appear:

- In the “Options” tab, and in the “Finishing Unit” section, leave FS-533 selected.

This ensures that the functions related to stapling appear. If not activated, all related functions will be disabled.
- Once configured, open the print dialog box which has the following presentation. In macOS, be careful because it changes depending on the program and the print dialog boxes differ slightly.
From Word, open the dialog box, and the following screen appears: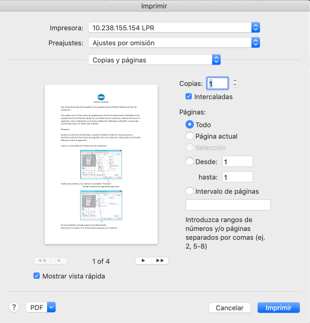
- In the “Copy & Pages” section, expand and select “Layout / Finish“

- The following screen will appear, and select in the “Finish” section

- From this screen, you can select the two stapling methods, corner staple or center staple.

- In PDF printing, the dialog box is different. Open Acrobat Reader and the following dialog box appears:

- Click the “Printer” button and go to its properties:

- In the “Layout” button, expand and select “Layout/Finish“
In this screen, select “Finish“.
- From here, check the “Staple” box, activating the options:

And from here, select either a corner staple or two centered staples. The drawing shows the staple position as it would appear in the printed job.
Linux
In different versions of Linux, we must ensure that the accessory in question is installed, referring to the FS-533 finisher.
- From the applications, select print, opening the print dialog box:

- In the dialog box on the right, click Print, opening the screen on the left.
Move down with the sidebar.
- Click “Print using the system dialog (Ctrl+Shift+P9)“, which will take you to the following screen:

- With the printer you are interested in (if you have several printers installed), select it first, then go to the Advanced tab, and in the Staple section, expand it.

Here you can select the different positions where you can place the staples.